For the last few days I worked on the kerfing and completed this task last night. When I started, it seemed easiest to start the kerfing at the tail block of the guitar and work my way to the neck block. This seemed to work quite well on the bass side of the guitar, but when I got to the cutaway side I ran into some difficulties. I found it really difficult to get the kerfing to conform to the curves of the cutaway and to hold it in place when gluing. It probably would have been easier to do a NON-cutaway for my first build, but the price on this kit was the deciding factor so I guess it will make any other future builds seem easier! I found it impossible to get kerfing right up to the neck block, so I have a small gap between the neck block and the end of the kerfing. I don't think this should cause an issue because the top/back will have plenty of surface area to glue to on the neck block. If I were to do this all over, I would have started at the neck block, wedged the kerfing into that tight space and use the tension of the kerfing to keep everything in place. (its kind of hard to explain what I mean, so I don't know if you get what I'm saying)
The only other thing I plan to do to the sides, is to add side braces. These are braces that are placed between the top and back kerfing at a few points along the sides, for example at the waist, mid point of the upper and lower bouts. Some old guitars simply used strips of material glued to the sides, others use small strips of wood. From what I understand, these braces help to prevent any side cracks if the guitar is exposed to temperature/humidity extremes or if it gets hit. These aren't included in a standard Martin kit, but many builders add them so I have decided to do the same.
Here's a couple pics of the finished kerfing:
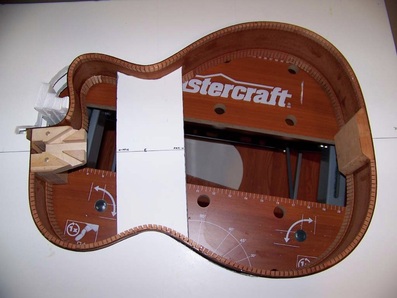

Here's the gap between the kerfing and the neck block that I mentioned.
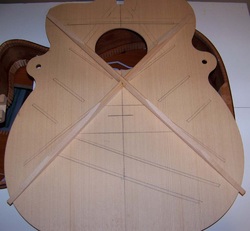
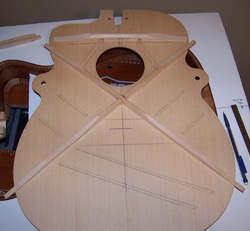
Now on to one of my problems that I had to correct!!!! Earlier on, I glued up the X-braces, figuring I would save myself a little time when I got to bracing the top. While waiting for the glue on the kerfing to dry, I pulled out the top and all the braces to see how I would approach gluing the braces. Then I realized I had made a mistake. The X-braces did not have the proper angle. So when making an evening cup of tea, I used the steaming kettle to steam the joint apart. I then used files to correct the angle, and reglued them. The following picture shows the corrected X-braces.
Next step? Side braces, as well as to start working on bracing the top of the guitar!
