Out of the 4 top braces, 2 were solid and 2 were loose. The rest of the top and neck seem to be solid so I didn't want to touch anything else. The edge of the fingerboard closest to the sound hole was slightly loose so I used a little bit of superglue at the end of it and clamped it to make sure its solid.
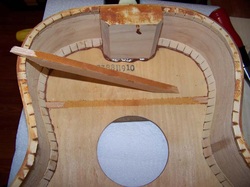
The first loose brace was the one right underneath the fingerboard extension. It was loose most of the length of the brace and cracked near the ends. You might be able to see near the kerfing where the brace was broken. I carefully chiseled and sanded away the remnants of old glue from the brace as well as the top.
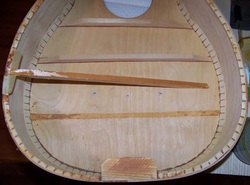
The other loose brace was closest to the tail block, right behind where the bridge would go. This brace came off pretty easily. You'll notice in this pic how crooked all the braces are. I'll keep the guitar original and reglue them just as crooked!
Once again, I cleaned off all the old glue residue.
Once again, I cleaned off all the old glue residue.
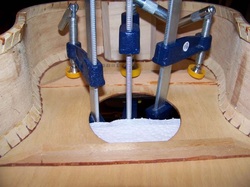
I applied a generous amount of glue and reclamped the first brace. You'll never even know it was broken!
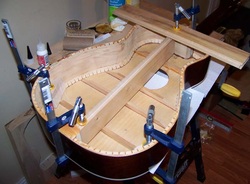
Without all the proper clamps I need, I once again had to come up with an odd way of clamping that back brace.... but it worked!
Now that all the braces are fixed, its on to the bridge!
Now that all the braces are fixed, its on to the bridge!
