So I'm typing this blog entry for the second time. Not sure what happened but I had everything typed out and then Microsoft kindly let me know that Internet Explorer had died and was going to be recovered.... it didn't recover my last 15 minutes of typing though! Sigh.....
Anyways.... I have glued 2 more back braces. I could not use the same clamping method as I used on the first brace because I could not hold sufficient pressure on the middle of the brace. I resorted to using one of those big slabs of ash again. But I must be doing something right because the back is forming into a nice radius, which you should be able to see in the picture below. The down side to this clamping method is the difficulty in cleaning up glue sqeeze out. Only 1 more brace to do now!
Anyways.... I have glued 2 more back braces. I could not use the same clamping method as I used on the first brace because I could not hold sufficient pressure on the middle of the brace. I resorted to using one of those big slabs of ash again. But I must be doing something right because the back is forming into a nice radius, which you should be able to see in the picture below. The down side to this clamping method is the difficulty in cleaning up glue sqeeze out. Only 1 more brace to do now!

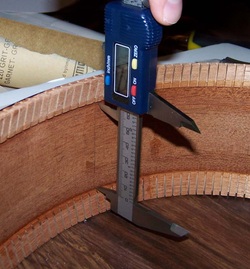
While waiting for the glue to dry on the back, I started adding reinforcements to the sides. I marked off the locations (in the case, the lower bouts) and measured what the length had to be.
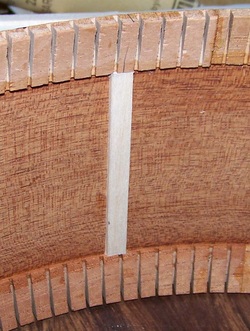
I used 1/4" wide 1/16" thick basswood strips for the reinforcements. I used a razor saw and file to trim the strips to the correct length so that the strip fit snuggly between the kerfing.
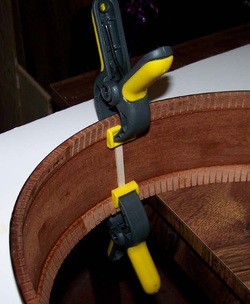
Then I glued the strips and clamped them using spring clamps. Once these dry, I will continue adding reinforcements to the lower bout, cutaway, and waist.
