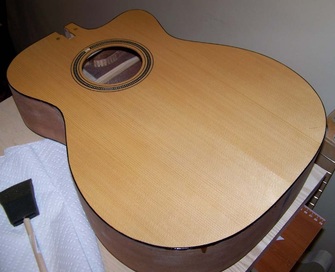
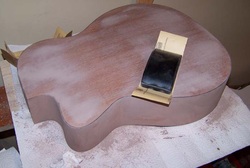
Over the past few days I've finished quite a lot. The body is now complete and ready for finish!
I sanded the top with the following grits of sandpaper: 100, then 150, then 220. I tried to fill the 2 marks I put in the top long time ago with sawdust and glue. The marks are still visible, but they look a bit better. After all the sanding, I "raised the grain". I did this by wiping the top with a damp paper towel. The dampness will make any small sanding scratches swell, then once dry I sanded again with 220 grit to end up with a nice smooth finish. Then I sealed the top by brushing on a thin coat of shellac.
I sanded the top with the following grits of sandpaper: 100, then 150, then 220. I tried to fill the 2 marks I put in the top long time ago with sawdust and glue. The marks are still visible, but they look a bit better. After all the sanding, I "raised the grain". I did this by wiping the top with a damp paper towel. The dampness will make any small sanding scratches swell, then once dry I sanded again with 220 grit to end up with a nice smooth finish. Then I sealed the top by brushing on a thin coat of shellac.
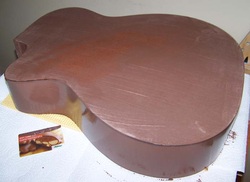
With the top completed, I went through the same sanding process on the sides and back. (100, 150, 220, raised grain, 220).
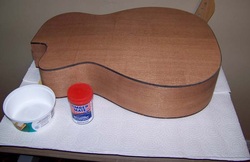
Mahogany is a porous wood, so in order to get a smooth finish these pores have to be filled. I purchased some Timbermate filler from Stewart MacDonald. I got rosewood coloured filler, which is a bit darker then the mahogany, which will make the grain show more when its finished.
Mahogany is a porous wood, so in order to get a smooth finish these pores have to be filled. I purchased some Timbermate filler from Stewart MacDonald. I got rosewood coloured filler, which is a bit darker then the mahogany, which will make the grain show more when its finished.
I mixed the filler with water as per the directions and brushed it on both with the grain and across the grain. I let it set for a while and scraped off the excess with an old gift card.
Then I sanded the back and sides with 220 grit sandpaper.
When I applied the filler to the sides, I did manage to get a little on the edge of the top. Since I sealed the top with shellac, all I had to do was wipe the filler off the top with a damp paper towel. This stuff sure is easy to work with and clean up!
When I applied the filler to the sides, I did manage to get a little on the edge of the top. Since I sealed the top with shellac, all I had to do was wipe the filler off the top with a damp paper towel. This stuff sure is easy to work with and clean up!
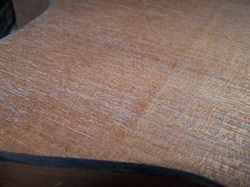
If you look closely in this pic, you can see the filler in the pores of the mahogany.
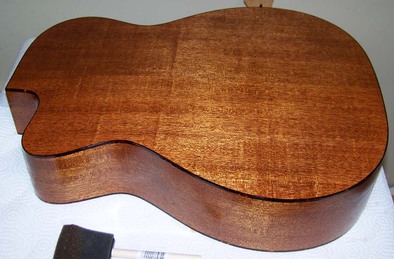
Once all my sanding was done, I sealed the sides and back with shellac. The pic below shows the back with a single brushed on coat of shellac. The figure in the wood shows up nicely, and you can actually see a couple of flames in the back. Just imagine how it will look with a thicker, shiny coat of shellac?!
Once all my sanding was done, I sealed the sides and back with shellac. The pic below shows the back with a single brushed on coat of shellac. The figure in the wood shows up nicely, and you can actually see a couple of flames in the back. Just imagine how it will look with a thicker, shiny coat of shellac?!