I've completed quite a lot since my last update so I'll have lots of stuff to post today. First of all, I had a bit of a mistake to fix..... previously I wrote about setting the neck angle. I did this with the fingerboard unfretted, but I should have set it taking into account the height of the frets! So I took some time to fix the neck angle so that I once again should have a good action.
After that, I clamped up the neck and fingerboard and measured out where the bridge will be located. I had to make sure that the bridge was centered to the body and neck, plus make sure that its in the right location so that the guitar will play in tune. I measured out the scale length PLUS an extra 0.150" of compensation as recommended on many of the discussion forums. This extra scale length makes up for the difference in string tension when a note is pushed towards the fretboard, allowing the guitar to play more in tune.
After that, I clamped up the neck and fingerboard and measured out where the bridge will be located. I had to make sure that the bridge was centered to the body and neck, plus make sure that its in the right location so that the guitar will play in tune. I measured out the scale length PLUS an extra 0.150" of compensation as recommended on many of the discussion forums. This extra scale length makes up for the difference in string tension when a note is pushed towards the fretboard, allowing the guitar to play more in tune.

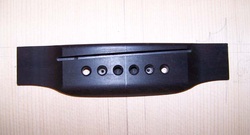
The bridge comes with only 2 of the bridge pin holes drilled through, so once I had the bridge location perfect, I drilled 2 tiny pilot holes through the bridge and top of the guitar. This will be my way of locating the bridge accurately after the guitar is sanded and finished.
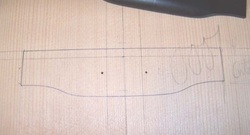
A pic of the 2 locating holes in the top.
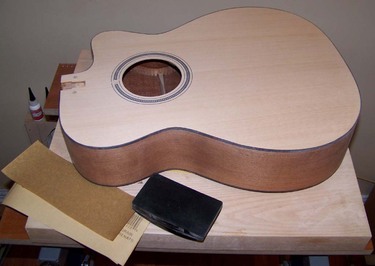
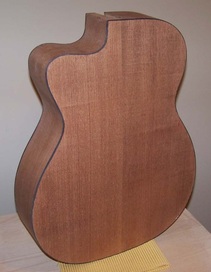
Then I moved on to sanding. I sanded the entire guitar twice with 100 grit sandpaper. I also used sawdust and glue to fill any major dings, scratches, gaps at the binding, etc. I'm pretty happy with the results even after rough sanding!
After rough sanding, I sanded the top with 220 grit to remove any sanding scratches and fine imperfections. My next step on the body will be to raise the grain on the top - I'll wipe the top with a damp cloth causing the wood fibers (and any fine scratches) to swell. Then once it dries again, you sand the surface and SHOULD get a surface with no imperfections in it. At that point I'll seal the top with shellac and sand the back with 220 grit, raise the grain on the back and sand again prior to pore filling.
Ok that's enough about the body.... now on to the work I did on the neck!
