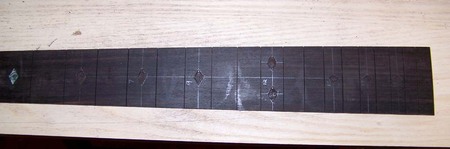
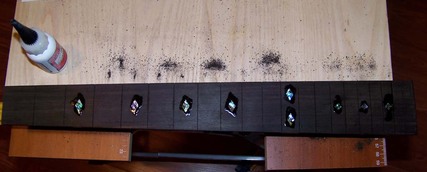
Finished lots of work since my last update. I finished routing out all the inlay cavities. I found a chisel came in handy in addition to my Exacto knife for cleaning up the edges of the cavities. Then I glued inlays in place.
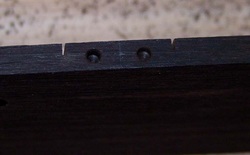
Then I drilled holes in the top edge of the fingerboard for the side markers. I started off with an 1/8" drill bit in my Dremel, followed by a 3/32" drill.
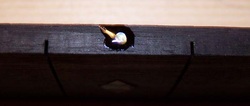
The side markers I purchased are around 2 mm in diameter, which means the hole I drilled was a little larger then required. I filled each hole with thick CA glue, then carefully put a marker in the hole and positioned it with the tip of my Exacto knife. Later, once the glue was dried I scraped and sanded off the excess glue.
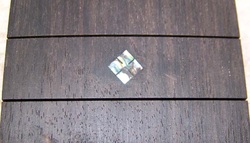
Over all, I was happy with the job I did on my inlay cavities, but a couple flaws certainly existed. I hoped I would be able to fill these gaps.
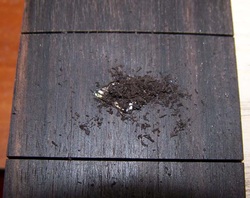
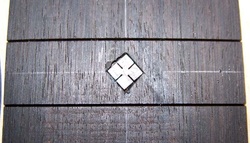
When I routed out the inlay cavities, I saved the ebony saw dust. I pressed some of the saw dust over the inlay and tried to push dust into all of the gaps. I did this with every inlay. After that, I flooded each inlay with thin CA glue. Once the glue was dried, I scraped away the excess glue and sanded the board with 220 grit sandpaper.
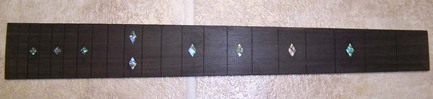
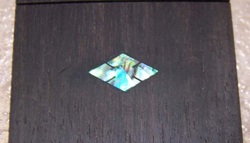
I was extremely happy with the results!!! All the gaps disappeared and the inlays look great!
Even the inlays with significant gaps turned out very well. One inlay still had a slight gap, which I filled with some more CA glue (which is drying as I type this). I am very proud of my first attempt at inlay work!
